Why Your Bread Has a Gummy Center: Fix It!
Learn why your sourdough bread has a gummy center and how to fix it for perfect loaves.
Hook Intro
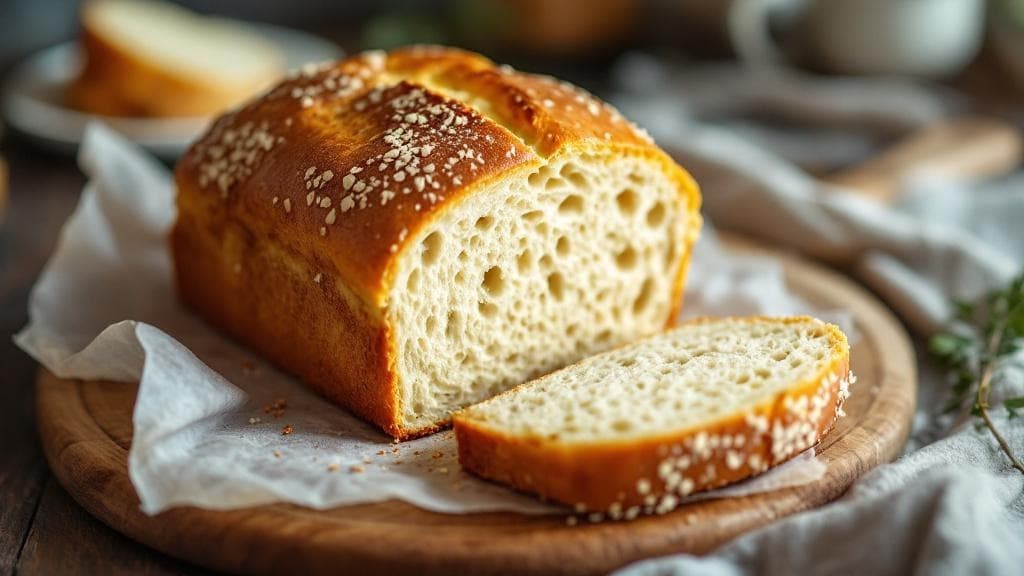
Have you ever sliced into a freshly baked loaf of sourdough only to discover a gluey, gummy center? It’s frustrating, right? You're not alone; this common issue can leave you feeling defeated. In this post, we’ll dive into why your bread has a gummy center and how to achieve that perfect crust and crumb you’ve been dreaming of.Quick Answer
TL;DR: A gummy center in sourdough is often caused by underbaking, too much hydration, or inadequate gluten development. Follow our tips to fix it!
Why This Matters
Understanding the reasons behind a gummy center can transform your baking game! Not only does it affect the texture, making your bread less enjoyable, but it also impacts the flavor and overall quality. Imagine serving a beautiful loaf, only to have it disappoint with a heavy, doughy interior. By learning the root causes, you can create bread that’s not just good, but absolutely unforgettable—golden crust, airy crumb, and all.Step-by-Step Guide
Check Your Ingredients
Ensure you’re using high-quality flour and the right hydration levels. Too much water can lead to a gummy center. Stick to a hydration level of around 70-75% for starters.Master Your Starter
Your sourdough starter should be bubbly and active. If it’s sluggish, your bread won’t rise properly, leading to a dense texture. Feed it about 4-6 hours before baking to ensure it’s at peak performance.Knead Properly
Kneading develops gluten, which creates structure in your bread. Aim for about 10-15 minutes of kneading, or use the stretch and fold method every 30 minutes during bulk fermentation. You want your dough to be smooth and elastic.Watch the Fermentation
Over or under-fermentation can lead to a gummy center. Look for your dough to double in size and show bubbles on the surface, typically taking 4-6 hours at room temperature.Pre-Shaping and Shaping
Handle your dough gently when pre-shaping and shaping. This process helps create tension, which supports the structure of your loaf. You want a tight, smooth surface before the final proof.Perfect Your Proofing
Final proofing can make or break your loaf. Aim for 45-90 minutes, depending on your kitchen’s temperature. Look for your dough to puff up slightly, but not double. A finger poke should leave a gentle indentation that springs back slowly.Preheat Your Oven
Make sure your oven is fully preheated at 450°F (232°C) for at least 30 minutes. This ensures a good oven spring and crust formation before the inside finishes baking.Bake with Steam
Introduce steam in the first 15-20 minutes of baking to help your bread rise and develop a crispy crust. You can use a cast iron pan with water or a spray bottle to mist the oven.Temperature Check
Use a thermometer to check for doneness. Your bread should reach an internal temperature of 200-210°F (93-99°C) for the perfect crumb.Cool Before Slicing
Let your bread cool on a wire rack for at least an hour before slicing. Cutting too soon can trap moisture inside, leading to that dreaded gummy texture.
Quick Reference Guide
| Item | Time/Amount | Signs of Success |
|---|---|---|
| Flour | High-quality, 70-75% hydration | Smooth, elastic dough |
| Starter | Feed 4-6 hours before baking | Bubbly and active |
| Kneading | 10-15 minutes | Elastic texture |
| Proofing | 45-90 minutes | Soft, puffy dough |
| Baking Temp | 450°F (232°C) | Golden-brown crust |
| Internal Temp | 200-210°F (93-99°C) | Firm, non-gummy center |
Common Mistakes to Avoid
Mistake: Underbaking your bread. + Always use a thermometer to check internal temperature for doneness.
Mistake: Too much hydration. + Stick to a hydration level of 70-75% for a balanced loaf.
Mistake: Not letting the dough rest. + Ensure adequate fermentation times to develop flavor and structure.
Mistake: Skipping the steam. + Always introduce steam in the oven to help with oven spring and crust formation.
Mistake: Slicing too early. + Allow the bread to cool completely on a wire rack for a non-gummy crumb.
Extra Tips
- Store your bread in a bread bag or wrapped in a kitchen towel to maintain freshness.
- Try adding a bit of whole wheat flour for added flavor and nutrients.
- Experiment with different proofing times to find what works best for your environment.
Pro Tips
Pro Tip: Use the windowpane test to check gluten development. If you can stretch a piece of dough thin without tearing, you’re good to go!
Pro Tip: Adjust your oven rack to the middle position for even baking.
Pro Tip: Consider using a baking stone for better heat retention and crust development.