Why Your Frosting Is Too Runny (And How to Fix It)
Learn why your frosting is too runny and how to achieve the perfect consistency for your baked goods!
Hook Intro
Have you ever whipped up a batch of frosting, only to find it pouring off your cake like a sad little river? It’s a frustrating moment, especially when you’ve put your heart into baking. Understanding why your frosting is too runny is the first step to achieving that luscious, velvety texture you desire. Let’s dive into the frosting world and rescue your cakes from a frosting disaster!Quick Answer
TL;DR: Runny frosting usually results from too much liquid or not enough powdered sugar. Adjusting these ingredients can help you achieve the perfect consistency.
Why This Matters
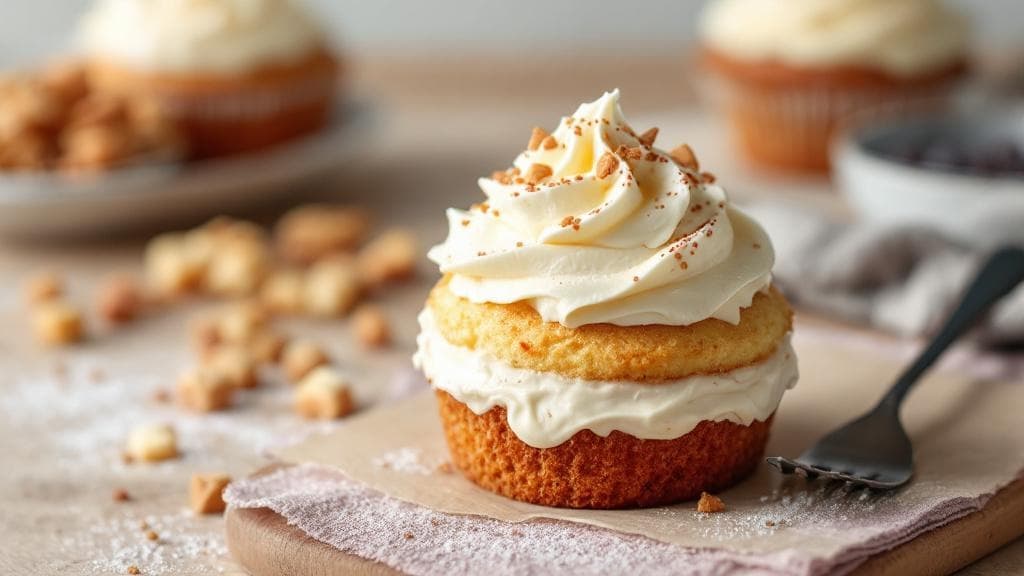
The right frosting can elevate your baking from good to extraordinary! Not only does it enhance the taste, but the texture and appearance are just as crucial. Think of a beautifully frosted cake that catches the eye with its thick, creamy frosting—it’s like the cherry on top of your baking masterpiece! Plus, achieving the right consistency prevents it from dripping down the sides of your cake, giving you that Instagram-worthy finish. Who wouldn’t want their dessert to look as good as it tastes?Step-by-Step Guide
Let’s tackle the issue of runny frosting with this easy step-by-step guide to achieve that ideal texture:Gather Your Ingredients
Start with unsalted butter, powdered sugar, milk (or cream), and vanilla extract. Ensure your butter is at room temperature for easy mixing.Start Mixing
In a mixing bowl, beat the softened butter on medium speed until it's creamy, about 2-3 minutes. You want it to be light and fluffy, not melted!Add Powdered Sugar
Gradually add in the powdered sugar, about a cup at a time, mixing on low speed to avoid a sugar cloud. The powdered sugar is the key thickening agent!Check Consistency
After mixing in about half the sugar, check the consistency. If it’s still too runny, keep adding more sugar until you reach your desired thickness.Add Liquid Sparingly
If your frosting is too thick, add milk or cream a teaspoon at a time. Remember, it’s easier to add liquid than to fix a runny frosting!Final Mix
Once you've reached the right consistency, add a splash of vanilla extract for flavor and mix until well incorporated.Taste Test
Don’t forget to taste your frosting! Adjust sweetness or flavoring as needed to suit your palate.Decorate
Now that your frosting is perfect, use it to frost your cake or cupcakes. Enjoy the smooth, creamy texture as you spread it on!
Quick Reference Guide
| Item | Time/Amount | Signs of Success |
|---|---|---|
| Butter | 1 cup | Creamy and light |
| Powdered Sugar | 3-4 cups | Thick and spreadable |
| Milk/Cream | 1-2 tbsp | Adjusts consistency |
| Vanilla Extract | 1 tsp | Enhanced flavor |
Common Mistakes to Avoid
Mistake: Using melted butter instead of softened butter. This leads to a runny frosting.
Mistake: Adding too much milk at once. This can make your frosting too thin!
Mistake: Skipping the powdered sugar. Without it, you’ll end up with a soupy mess.
Mistake: Not mixing long enough. Make sure to beat until fluffy!
Extra Tips
- For chocolate frosting, add cocoa powder to the powdered sugar for a rich flavor.
- Store leftover frosting in an airtight container in the fridge for up to two weeks.
- If you’re in a pinch, use store-bought frosting, but consider whipping it to improve the texture!
Pro Tips
Pro Tip: For a light and airy frosting, try using whipped cream instead of butter for a unique twist!
Pro Tip: A pinch of salt can enhance the sweetness in your frosting, balancing the flavors perfectly.
Pro Tip: If your frosting is still runny after adjustments, refrigerate it for about 15 minutes to help it firm up.