Homemade Bagels Step by Step: Your Ultimate Guide
Master the art of homemade bagels with this detailed guide! Enjoy fresh, chewy bagels right from your oven.
Hook Intro
Have you ever bitten into a bagel and thought, "Why can’t I make these at home?" Well, guess what? You absolutely can! Homemade bagels are not only achievable, but they also bring a delightful aroma to your kitchen that store-bought versions just can’t match. Plus, you get to customize them just the way you like! Let’s dive into the world of homemade bagels and make your breakfast dreams come true.Quick Answer
TL;DR: Making homemade bagels involves mixing, boiling, and baking simple ingredients like flour, water, yeast, and salt. With a few easy steps, you’ll have chewy, delicious bagels in no time!
Why This Matters
Making your own bagels is a game changer. Not only do you get to enjoy the freshest bagels straight from your oven, but you can also experiment with flavors and toppings that suit your palate. Imagine the satisfaction of biting into a warm, chewy bagel topped with everything from sesame seeds to everything bagel seasoning. Plus, you control the ingredients, making them a healthier option compared to many store-bought alternatives. And let’s be honest, there’s nothing quite like the smell of freshly baked bagels wafting through your home!Step-by-Step Guide
Gather Your Ingredients
You’ll need 4 cups of bread flour, 1 tablespoon of sugar, 2 teaspoons of salt, 1 packet of active dry yeast, and 1 ½ cups of warm water (about 110°F). Don't forget the toppings like sesame seeds or everything bagel seasoning!Mix the Dough
In a large bowl, combine the flour, sugar, and salt. In a separate bowl, dissolve the yeast in warm water and let it sit for about 5 minutes until frothy. Add the yeast mixture to the flour and mix until a shaggy dough forms.Knead the Dough
Transfer the dough to a floured surface and knead for about 10 minutes until it’s smooth and elastic. It should bounce back when you poke it. If it’s too sticky, sprinkle a little more flour as needed.First Rise
Shape the dough into a ball and place it in a lightly greased bowl. Cover it with a damp cloth and let it rise in a warm place for about 1 hour, or until doubled in size. You’ll know it’s ready when it looks puffy and feels light.Shape the Bagels
Once risen, punch down the dough to release the air. Divide it into 8 equal pieces. Roll each piece into a ball, then poke a hole in the center with your finger, stretching it to form a bagel shape. They should look like little doughnuts!Boil the Bagels
Bring a large pot of water to a gentle boil. Carefully drop a few bagels in at a time and boil for about 1-2 minutes on each side. This step is crucial for that chewy texture! Watch them puff up and turn slightly glossy as they boil.Preheat the Oven
While the bagels are boiling, preheat your oven to 425°F (220°C). Line a baking sheet with parchment paper to prevent sticking.Bake the Bagels
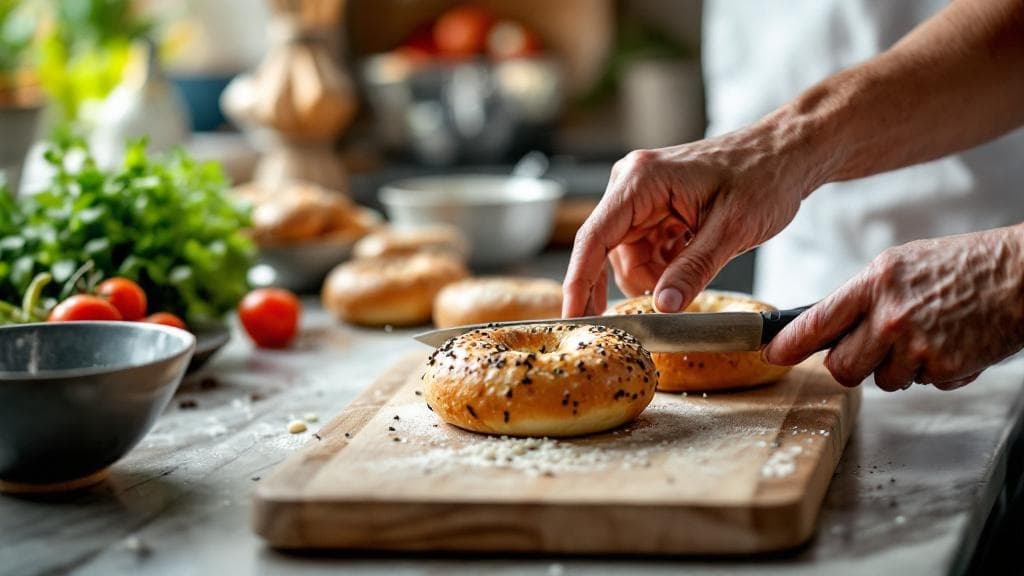
After boiling, place the bagels on the prepared baking sheet. If you want, sprinkle your toppings over them now. Bake for about 20-25 minutes until they’re golden brown and sound hollow when tapped on the bottom.Cool and Enjoy
Remove the bagels from the oven and let them cool on a wire rack for at least 15 minutes. This step is tough, but trust me, they’ll be worth the wait. Slice them open, toast, and slather with cream cheese, or use them for your favorite sandwiches!
Quick Reference Guide
| Item | Time/Amount | Signs of Success |
|---|---|---|
| Proof Yeast | 5 minutes | Frothy mixture |
| Knead Dough | 10 minutes | Smooth and elastic |
| First Rise | 1 hour | Doubled in size |
| Boil Bagels | 1-2 minutes each side | Puffed and glossy |
| Bake Bagels | 20-25 minutes | Golden brown, hollow sound |
| Cool | 15 minutes | Ready to slice! |
Common Mistakes to Avoid
Mistake: Over-proofing the dough.
Why it’s wrong: If you let it rise too long, it can collapse.
Fix: Keep an eye on it; look for a puffy appearance but not overly inflated.
Mistake: Not boiling the bagels long enough.
Why it’s wrong: This step is essential for the chewy texture.
Fix: Ensure you boil for at least 1 minute on each side.
Mistake: Using all-purpose flour instead of bread flour.
Why it’s wrong: Bread flour has more gluten, which gives bagels their chewy texture.
Fix: Stick with bread flour for best results!
Mistake: Skipping the cooling time.
Why it’s wrong: Cutting into them too soon can make them gummy.
Fix: Be patient; let them cool completely before slicing.
Mistake: Forgetting to preheat the oven.
Why it’s wrong: If the oven isn’t hot enough, your bagels won’t rise properly while baking.
Fix: Preheat the oven while you prepare the bagels.
Extra Tips
- Storage: Keep your bagels in a plastic bag at room temperature for up to 3 days or freeze them for longer freshness!
- Variations: Try adding spices like garlic powder or onion powder to the dough for an extra flavor kick.
- Shortcuts: If you’re pressed for time, you can use a bread machine for kneading and rising!
Pro Tips
Pro Tip: For a shiny finish, brush the bagels with an egg wash before baking!
Pro Tip: To make your bagels even more flavorful, add toppings to the boiled bagels before baking!
Pro Tip: If you want a softer bagel, add a tablespoon of malt syrup to the boiling water!