No-Knead Bread: The Easiest Method You Can Master
Discover the simplest no-knead bread method for a fresh, crusty loaf at home!
Hook Intro
Have you ever craved that warm, crusty loaf of bread, but the thought of kneading makes you want to run for the hills? Well, you’re in luck! No-knead bread is here to save the day, and it’s easier than you think! With minimal effort, you can produce a golden-brown, artisanal bread that’s perfect for slathering with butter or dipping into soups. Let’s dive into the world of no-knead bread and discover how simple it can be!Quick Answer
TL;DR: No-knead bread requires just four ingredients and a little patience. Mix them, let the dough rise for 12-18 hours, and bake for a deliciously crusty loaf!
Why This Matters
No-knead bread is not just a time-saver; it’s a game-changer for those new to baking or those with busy schedules. With just flour, water, yeast, and salt, you can create a mouthwatering loaf with a chewy interior and a perfectly crispy crust. Plus, since it requires no kneading, you can easily fit it into your routine. Imagine waking up to the smell of freshly baked bread wafting through your kitchen, with minimal effort on your part!Step-by-Step Guide
Gather Ingredients
Start with 3 cups of all-purpose flour, 1 ½ teaspoons salt, ¼ teaspoon instant yeast, and 1 ½ cups of warm water (about 110°F). Make sure your yeast is fresh for the best results!Mix the Dough
In a large bowl, combine the flour, salt, and yeast. Gradually pour in the warm water, stirring with a wooden spoon or spatula until a shaggy dough forms. This should take about 2-3 minutes. Don’t worry about lumps; that’s perfectly fine!First Rise
Cover the bowl with plastic wrap or a clean kitchen towel and let it rise at room temperature for 12 to 18 hours. You’ll know it’s ready when the surface is dotted with bubbles and the dough has doubled in size.Shape the Dough
After the first rise, generously flour your work surface and gently scrape the dough out of the bowl. With floured hands, fold the dough over itself a couple of times to form a rough ball. It doesn’t have to be perfect—embrace the rustic charm!Second Rise
Place the dough seam-side down on a floured piece of parchment paper. Cover it with a kitchen towel and let it rise for another 1 to 2 hours. Preheat your oven to 450°F about 30 minutes before baking.Prepare the Pot
While the oven heats, place a Dutch oven (with the lid on) inside for about 30 minutes. This step is crucial for achieving that crispy crust!Bake the Bread
Carefully remove the hot Dutch oven from the oven. Grab the parchment paper and lift the dough straight into the pot. Cover it with the lid and bake for 30 minutes. Then, remove the lid and bake for another 15-20 minutes until the bread is golden brown and sounds hollow when tapped on the bottom.Cool Down
Transfer the loaf to a wire rack and let it cool for at least 30 minutes before slicing. This allows the steam to escape and prevents a gummy texture.Slice and Enjoy
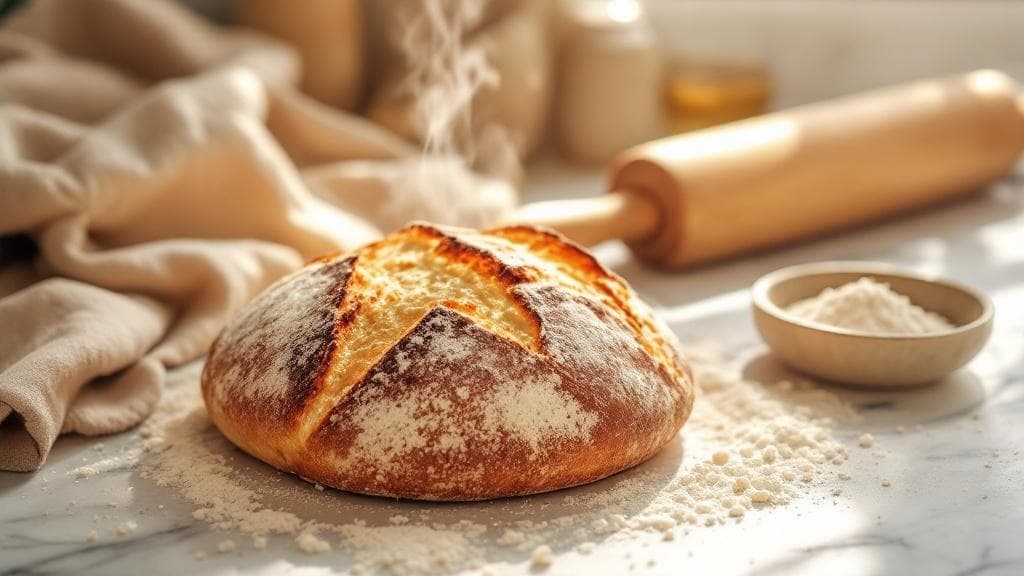
Once cooled, slice into your masterpiece and enjoy the warm, crusty goodness. Don’t forget to slather it with butter or your favorite spread!
Quick Reference Guide
| Item | Time/Amount | Signs of Success |
|---|---|---|
| First Rise | 12-18 hours | Dough doubles, surface has bubbles |
| Second Rise | 1-2 hours | Dough puffs up slightly |
| Oven Temperature | 450°F | Preheated and ready for baking |
| Baking Time | 45-50 minutes | Golden brown crust, hollow sound when tapped |
Common Mistakes to Avoid
Mistake: Not using enough water. Why it's wrong: The dough may be too dry, leading to a dense loaf. Fix: Always measure your water accurately; the dough should be wet and sticky.
Mistake: Skipping the second rise. Why it's wrong: This can result in a dense bread with less flavor. Fix: Be patient! Allow the dough to rise properly.
Mistake: Not preheating the Dutch oven. Why it's wrong: A cold pot can lead to a less crispy crust. Fix: Always preheat your pot for the best crust results.
Mistake: Cutting the bread too soon. Why it's wrong: This can result in gummy bread. Fix: Wait at least 30 minutes for the loaf to cool before slicing.
Extra Tips
- Store leftover bread in a paper bag for a few days or freeze it for longer storage.
- Experiment with adding herbs or cheese to the dough for a flavor twist!
- If you’re short on time, you can let the dough rise in the fridge overnight.
Pro Tips
Pro Tip: For an extra crispy crust, place a few ice cubes in the pot when you remove the lid. The steam will make your crust even more delightful!
Pro Tip: Use a kitchen scale to measure your flour for the most accurate results. A light hand can lead to a better dough texture!
Pro Tip: If you’re feeling adventurous, try adding whole grains or seeds for added texture and nutrition. Just adjust the water slightly to keep the dough consistency right.